

Better Homes And Gardens Sheets Clearance
Amelia has been an avid gardener since childhood and enjoys experimenting with natural and sustainable gardening methods.
The easiest and best way to start a new garden bed or maintain an old one requires no digging and no sod removal. In the end, you will have a garden that doesn't get muddy or compacted and needs less water and weeding. Over time, fertility increases as the mulch decomposes, and most of the material will be free!
This method, called sheet mulching, involves smothering the existing ground cover and weeds with layers of organic matter, resulting in rich fertile planting beds. All you have to do is dump the layers on and spread them out.
In This Article
- Benefits of Sheet Mulching
- Sheet Mulching Recipe
- Two Problem Weeds
- Applying the Weed Barrier
- What Should I Use for Compost or Manure?
- Which Mulch to Use
- Planting
- Irrigation
- Maintenance
- Enjoy Your Peaceful, Sustainable Garden
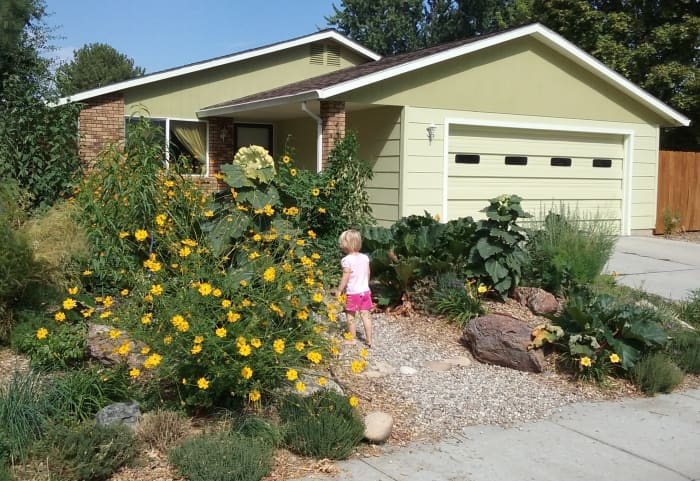
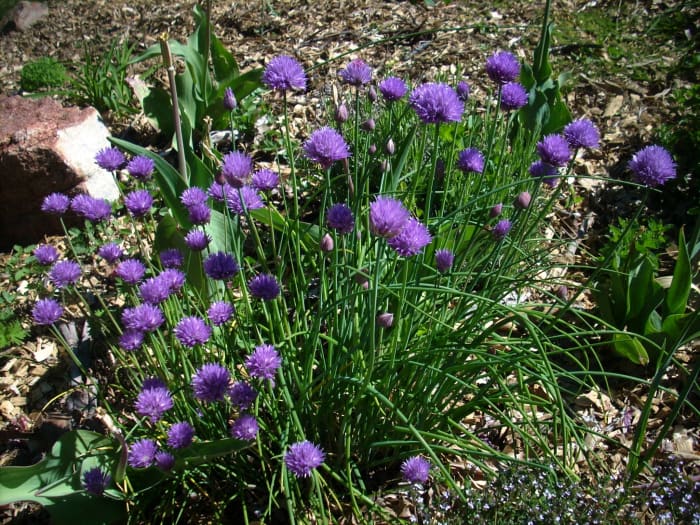
My sheet-mulched garden in August. Pictured here are asparagus, rhubarb, lavender, thyme, passion flower, basil, bush cherry, Jerusalem artichoke, and more.
Benefits of Sheet Mulching
- You Don't Have to Mess With Dirt. I tell people I don't like dirt. They always laugh because I adore gardening, but it is the truth. The alkaline soil where I live makes my nails break and my skin crack. This is the beauty of sheet mulching! I almost never need to touch dirt. I can plant seeds, harvest root crops, and weed the garden without ever touching dirt.
- Beneficial to Soil Organisms. We are becoming more and more aware of how beneficial soil life is to our garden and even to ourselves. However, any time the soil is tilled and left bare, billions of those organisms die—everything from worms that bring minerals from deep in the soil and break down organic matter into a usable form; to mycorrhiza that act like long root extensions distributing water and nutrients; to Bradyrhizobia, which fix nitrogen from the air onto the roots of certain plants. Having killed all these, we then have to take over those jobs and supply the minerals and nitrogen, and get the water to exactly the right place, or just over-water. This brings me to my next point.
- Conserves Water. Keeping your plants sufficiently hydrated can be difficult and expensive. Using woodchip mulch prevents evaporation, protecting your plants and allowing less frequent watering. Not only do woodchips cover the earth, they also absorb water themselves to hold water in longer, making it available to your plants. It just makes sense to use this often-free resource to reduce water use and protect your plants from drought-induced stress.
- Easier Weeding. You will, most likely have little weeding to do in your sheet-mulched garden because the mulch will kill almost all weeds and you won't be turning the soil to expose weed seeds that would have then germinated. In addition to this delightful benefit, you will also find weeding so much easier because the weeds pull right out of the woodchips, root and all, and you don't even need to get muddy!
Basics of Sheet Mulching
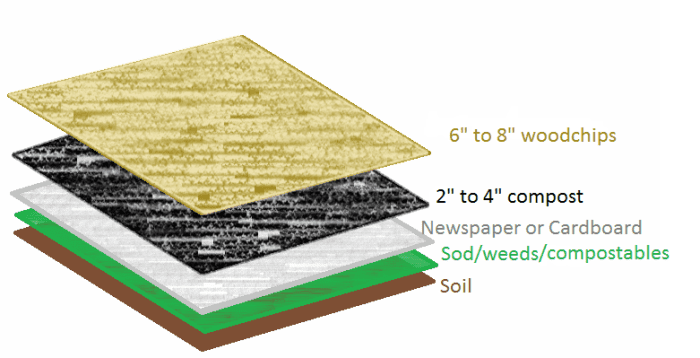
The Recipe
Sheet mulching is so simple! You just need three ingredients (the fourth is optional):
- Weed barrier: newspaper or cardboard
- Compost or manure
- Woodchips
- Oyster mushroom inoculant (optional)
It is really that simple. Layer them on in the order above (weed barrier first) and then start planting!
Two Problem Weeds
Canada Thistle has sufficient stores in its taproot to survive year or more before breaking through into the light. If this happens to you as it did to me in my last garden, persistently yank them up before they flower and they will be gone within a year. Thereafter, you will only need to deal with seeds flying over from your neighbors.
Bindweed, or wild morning glory, comes up looking so beautiful, then covers everything that holds still long enough, and then turns mildewy and dies, looking awful and having smothered everything you really wanted to grow. Bindweed is so tenacious because it has a root that can go down ten feet or more and the plant can travel twenty feet laterally. If you are fortunate enough to live in Colorado or any other state that offers bindweed parasites, by all means get some from your local extension! For the rest of us, do whatever you can to get rid of it before you start, and then really layer on the cardboard. You see, this weed came from Europe where it is kept in check by the bindweed mite and the bindweed moth, neither of which made it to the new world on their own. So, don't feel bad trying to eradicate this nuisance, it doesn't belong in this ecosystem!
Applying the Weed Barrier
Your weed barrier can be any biodegradable material that comes in sheets— newspaper and cardboard are two readily available and free materials that work well. Because they are mainly a source of carbon, they aid the decomposition of any sod or other green plant material you are covering.
- First, dig out the toughest perennial weeds.
- Any available compostable materials, including weeds, kitchen scraps, branches, and even logs, can be applied before the weed barrier.
- Layer the weed barrier generously all over the garden area and path if desired, working around shrubs and trees.
- Newspaper should be no less than four sheets thick, but more is better.
- Cardboard usually suffices in one layer, but double it up if you have bindweed.
- Any material you use should be overlapped at the edges to cover all gaps.
What Should I Use for Compost or Manure?
If you are on a budget, horse manure can usually be procured for free. I have used it with beautiful results. Otherwise, any compost or manure will work for this layer.
- Steer manure should just be an inch deep because it is so hot.
- Compost or composted horse manure should be 2 to 4 inches deep.
Which Mulch to Use
The final layer is the mulch and should ideally be woodchips with green leaf material. The green indicates nitrogen and will help the chips decompose faster. This layer will protect the soil from evaporation and will break down over time to nourish the soil.
Pile the woodchips 6 to 8 inches deep. After about a year, this whole heap will be only slightly higher than the ground around it. One garden that I piled twelve inches high was at exactly the elevation of the sod around it one year later.
Important: Do not use walnut woodchips as the hormone juglone will prevent most other things from growing.
Read More From Dengarden
Earlier, I mentioned the benefit of mycorrhiza in your soil. These organisms act as extensions to the roots of your plants and redistribute nutrients and water throughout the soil. However, you should expect them to manifest themselves in your garden as fungi of various shapes and colors. These will occasionally envelop a garden plant but overall, they are innocuous and will cause little harm and much good. It is possible to prevent undesirable fungal blooms if you start with fresh woodchips and immediately inoculate them with a desirable fungus, such as oyster mushrooms.
Note: Never eat a mushroom unless you are certain you can identify it as edible!
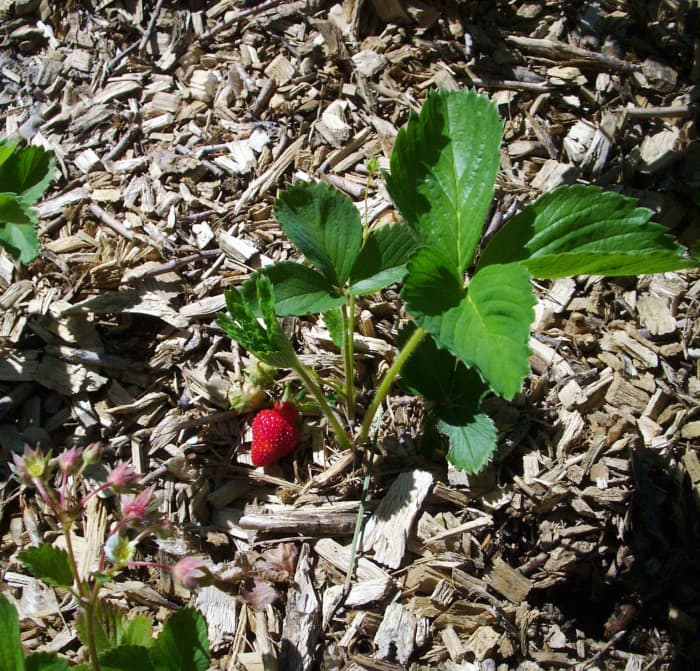
My first sheet-mulched garden
Planting
Now you can plant! Seeds and potted plants can be planted right in the woodchips, and the roots will reach down to get the nourishing compost or manure.
It's best to lay out your sheet mulch garden in the fall so that it can decompose throughout the winter, but you can lay it out and plant immediately.
Because the woodchips will settle, trees and shrubs should be planted in a depression. Monitor these plants to ensure the root ball does not become exposed.
Irrigation
Though this method will reduce the need for irrigation, it will not eliminate it entirely unless you get rain weekly or more, so keep watering as much as is needed. How much water is needed depends largely on how much green matter is in your woodchips, as this green matter will aid decomposition and water retention. It also depends upon your method of watering, whether you are growing perennials or annuals, and how drought-tolerant the plants are.
Buried Drip Irrigation Method
My favorite method of watering is buried drip irrigation. It is easy to lay out and can be hooked into your sprinkler system or hose. Also, when the line is buried under a couple inches of woodchips, evaporation is virtually eliminated. Such a system can be anything from soaker hoses to PVC with holes drilled in it.
Maintenance
How much maintenance is required depends upon what you are growing.
Perennials
If you are only growing perennials, you will need to do little maintenance. However, I do recommend a top dressing of woodchips with leaf matter (or compost with woodchips if it does not have leaf matter) once a year until the plants begin providing their own mulch. If you find the fallen leaves unsightly, cover them with a light dressing of woodchips. Ideally, you will interplant nitrogen-fixing plants to continue to provide fertilizer to the other plants indefinitely, without maintenance on your part. Comfrey and other mineral accumulators will also continuously provide mulch and nutrients to your garden.
Annuals
If you are growing annuals, you will need to do more to keep the bed fertile. It is best to put down a thin layer of compost or manure and a layer of woodchips every year, though you can certainly skip a year or two without replenishment. These layers can be placed right over your annual plants at the end of the season, but make sure to rotate plant types to different areas each year.
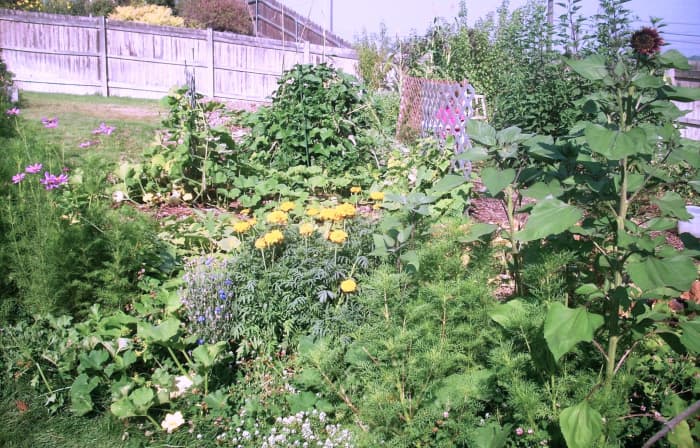
My new annual garden uses a keyhole shape to maximize edge and accessibility. On the inside of the planting peninsulas I am planting sainfoin, a nitrogen-fixing perennial with beautiful pink flowers that will continue to nourish the planting from year to year. I hope this will decrease the need to add compost year after year.
Possible Annual Garden Layout
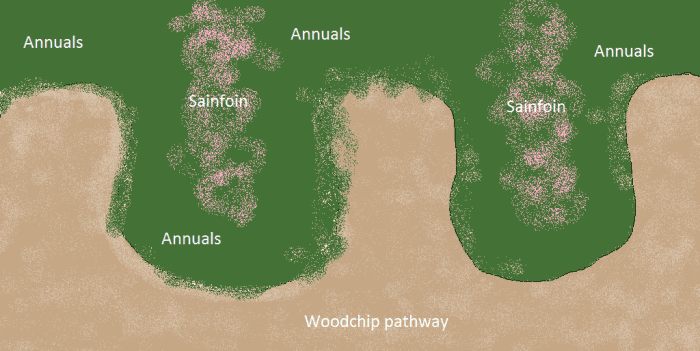
Keyhole gardens maximize accessible garden space. Planting sainfoin, or other nitrogen fixing perennials in the middle of each peninsula ensures continued fertility. All plants are planted in woodchips with compost. The path has no compost.
Enjoy Your Peaceful, Sustainable Garden
Sheet mulching brings sustainability into the garden, upending the tradition of tilling that we have perpetuated ever since we left "the garden." No longer do we need to bring large, expensive, dangerous, noisy rototillers into our peaceful gardens! Now we can use the waste product of another's trade to initiate a cycle of soil-building that, over time, can become less and less reliant on our input.
This content is accurate and true to the best of the author's knowledge and is not meant to substitute for formal and individualized advice from a qualified professional.
Questions & Answers
Question: There is a strip of dirt between the sidewalk and a fence about 5' X 60'. Currently, it contains dried Russian Thistle. It is on a slope from the sidewalk to the fence. It can be covered with cardboard but mulch will not stay on it. Will cardboard set back Russian Thistle?
Answer: It will definitely set back Russian thistle, but it will probably eventually make it through. I have seen Canadian thistle come through cardboard and mulch a year after placement. However, it is very easy to pull up when growing through deep mulch. If you pull them up regularly they will die off.
Amelia Walker (author) from Idaho on April 03, 2017:
Thanks for the clarifying question, Rob. The answer to this question depends upon whether you are growing annuals or perennials. Perennials will drop their own mulch each year and will therefore become self-sufficient and additional mulching will not be needed. Annuals, however, are usually removed each year, so though the mulch layer may be skipped some years, it should be renewed from time to time.
Rob Muldoon on March 31, 2017:
"Over time, fertility increases as mulch decomposes"
After a few years, will you be able to skip adding the mulch layer?
Better Homes And Gardens Sheets Clearance
Source: https://dengarden.com/gardening/Starting-a-New-Garden-the-Easier-Way
Posted by: lairdobler1999.blogspot.com
0 Response to "Better Homes And Gardens Sheets Clearance"
Post a Comment